Kameti Operation
Master the complete lifecycle of your community fund with our structured Kameti Operation module.
The Kameti Operation module is the heart of the Kameti Ledger system. It involves the entire lifecycle of a community fund, from its initial setup to the final payouts.
This module consists of four primary sections:
1. Kameti Creation
Creating a new Kameti cycle is a structured process. Follow these steps to set up your fund:
Step 1: Initiate Creation
Go to the Kameti tab on your dashboard and click the “Add Kameti” button to start the process.
Step 2: Set Budget & Duration
In this step, you need to define the financial parameters:
- Kameti Budget: The total pool amount.
- Monthly Installment: The amount each member contributes every month.
- Duration: The total number of months the Kameti will run. The system will display the total Kameti value based on these inputs.

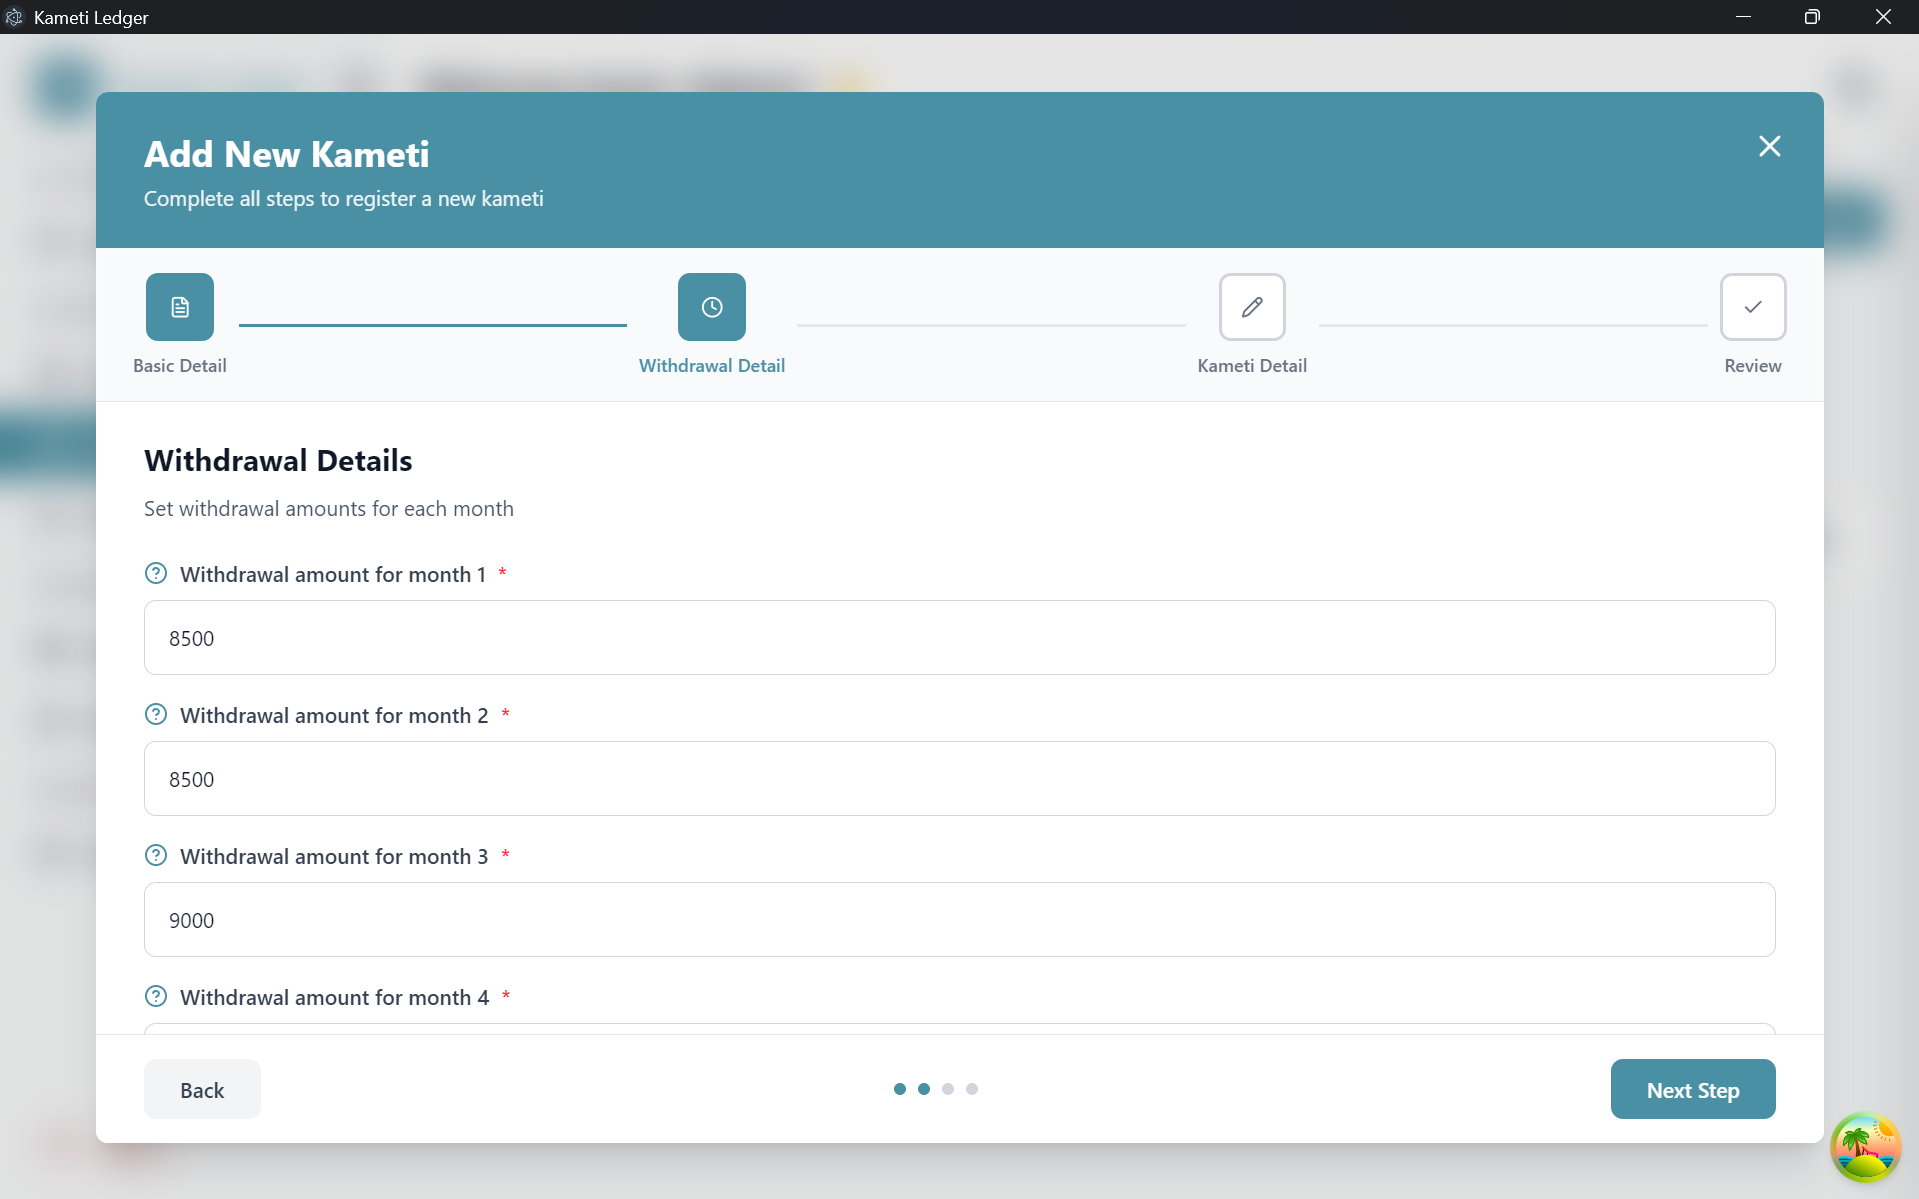
Step 3: Set Withdrawal Amounts
Specify the withdrawal amount for each month of the cycle. The number of withdrawal slots will automatically match the duration (e.g., if the duration is 10 months, you will set 10 withdrawal amounts).
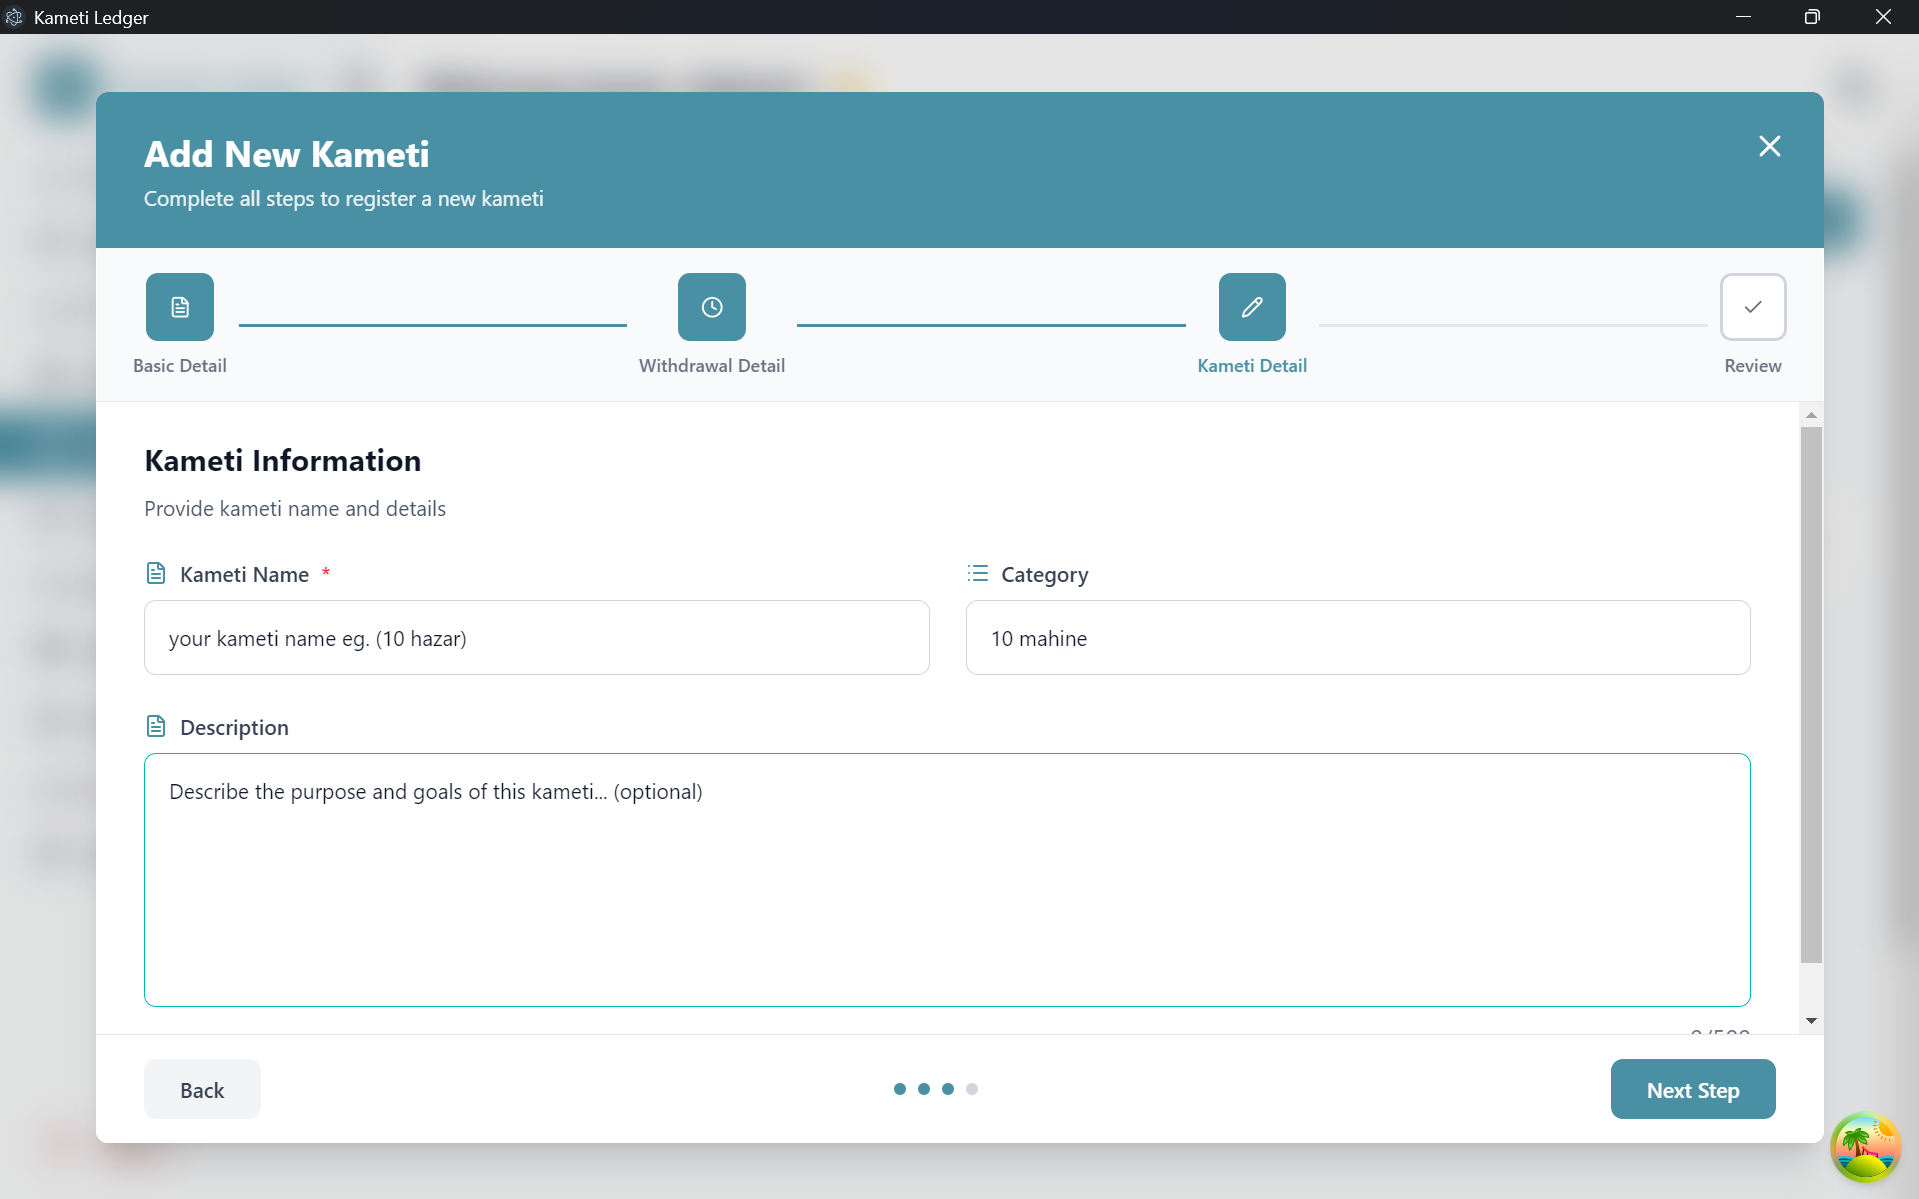
Step 4: Add Kameti Details
Provide the following descriptive information:
- Name: A unique name for your Kameti.
- Category: Select the appropriate category.
- Description: Add a brief overview or rules for the Kameti.
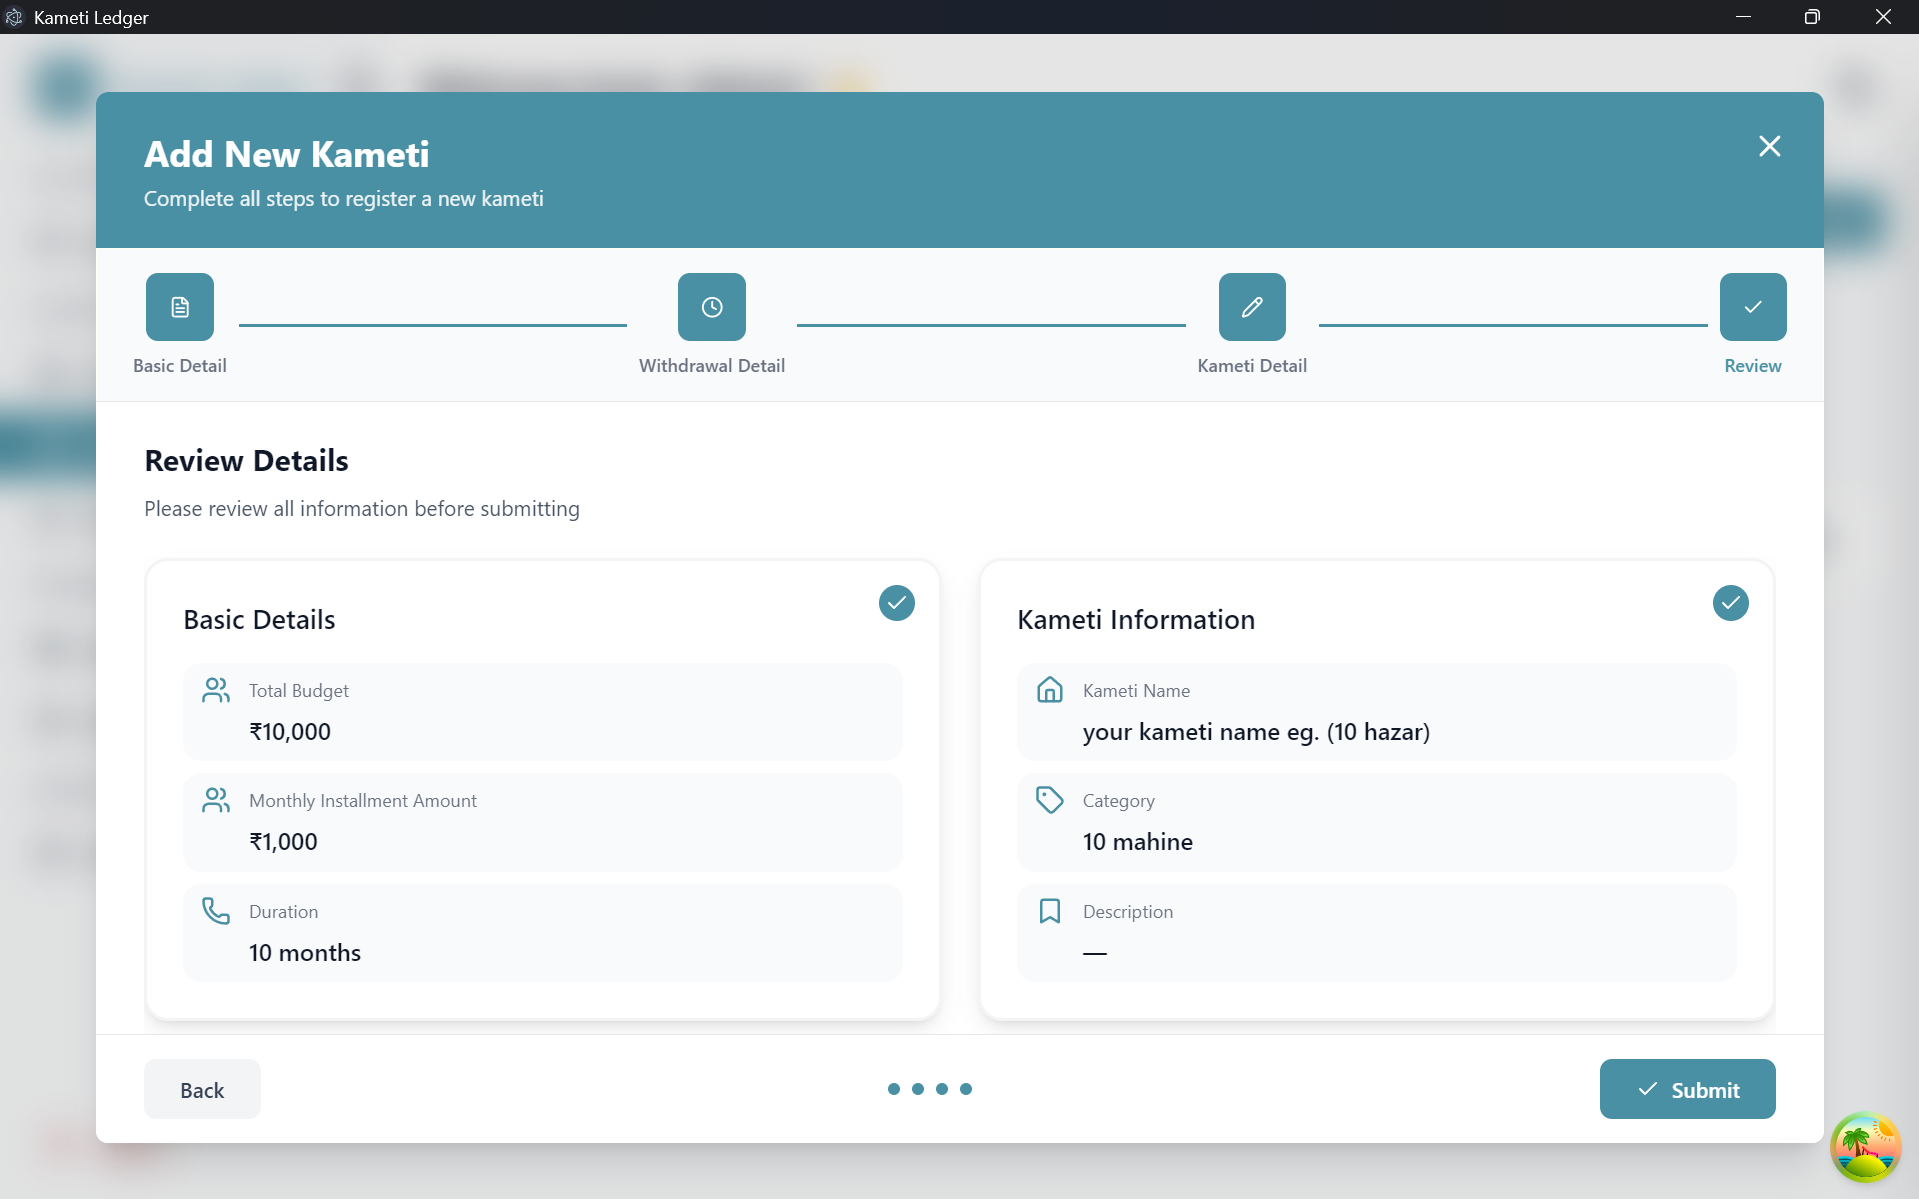
Step 5: Review & Confirmation
Before finalizing, review the Confirmation Details page to ensure all information is accurate.
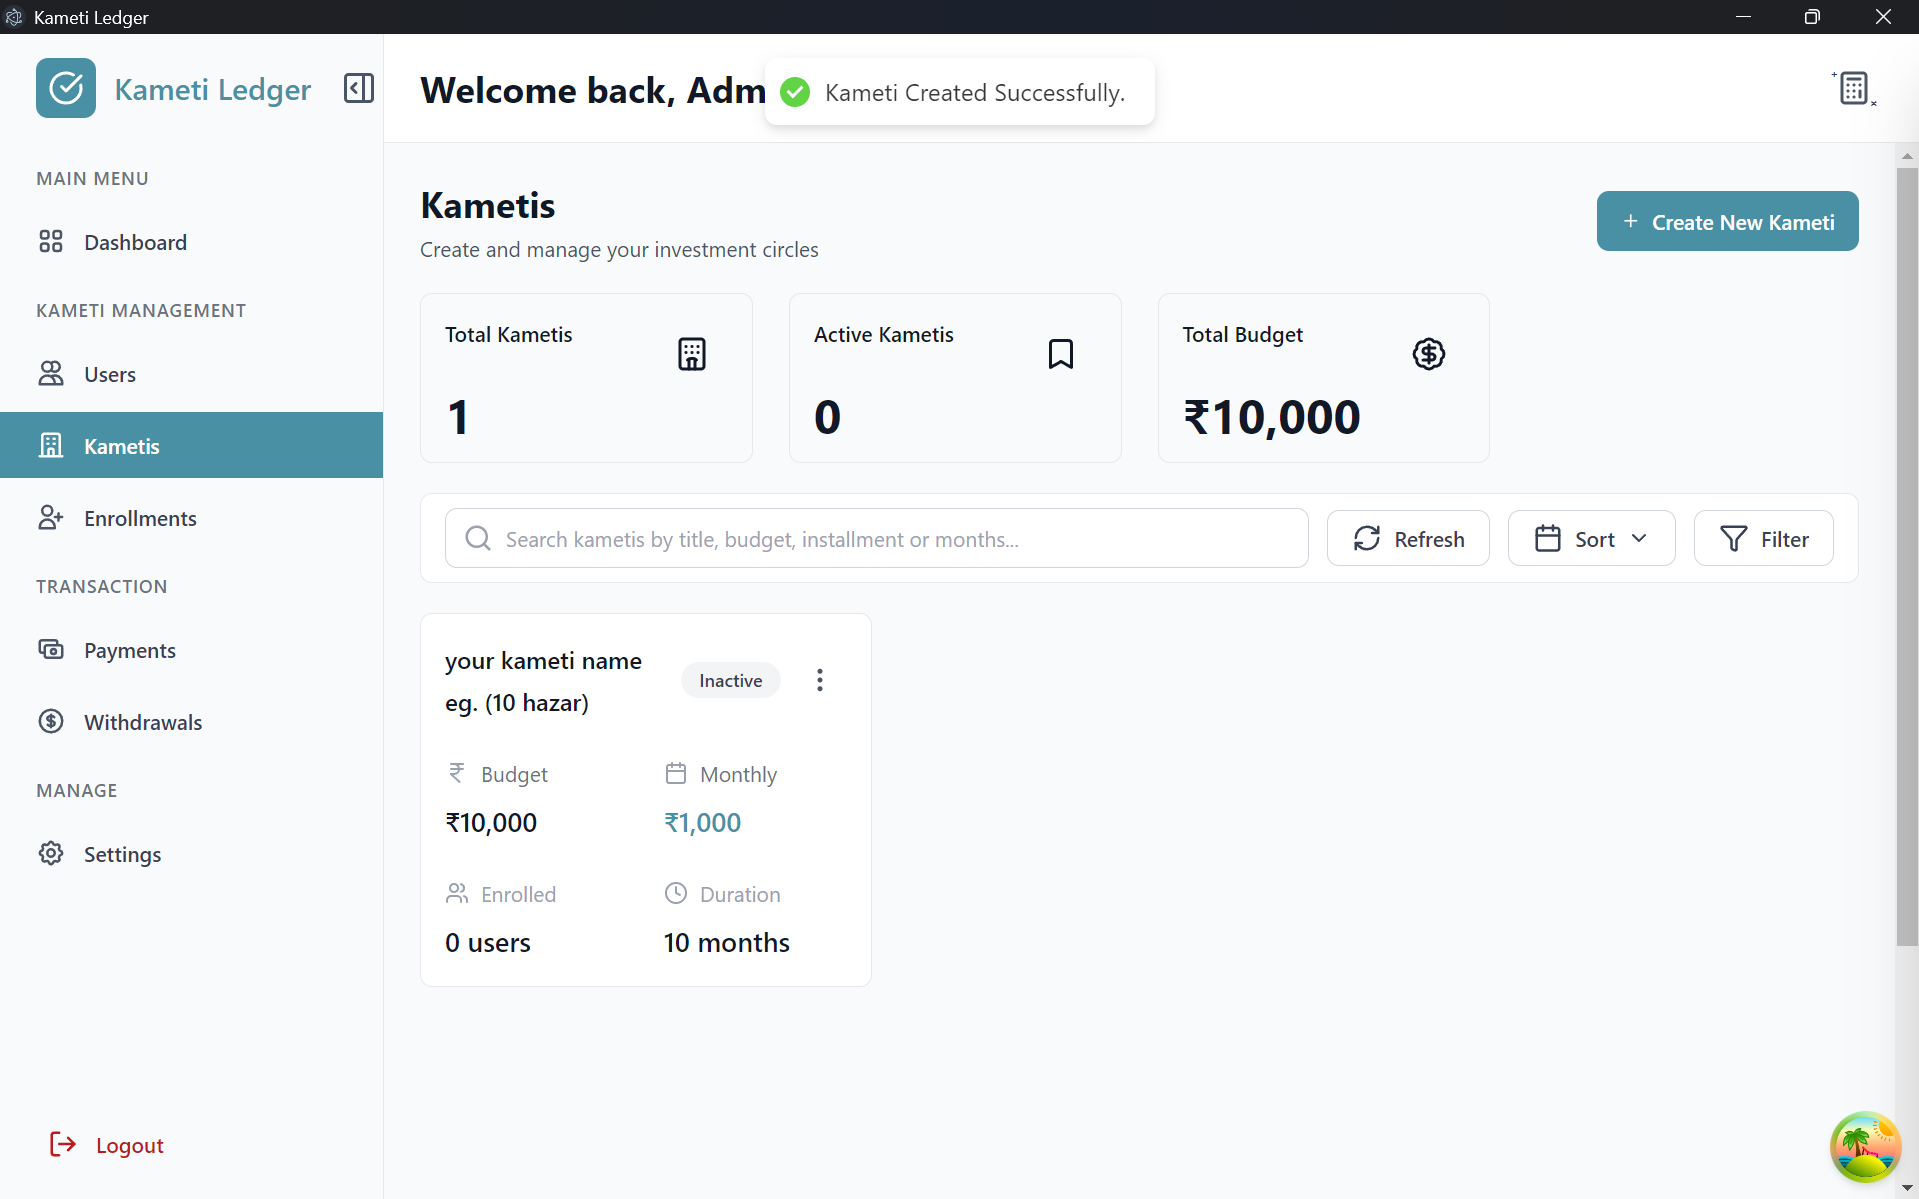
Step 6: Success & Enrollment
After confirmation, you will be redirected to the dashboard with a success message. Your Kameti is now created, and you can proceed to enroll members.
2. Enrollment
Once a Kameti is created, the next step is to enroll members. Follow these steps to register users:
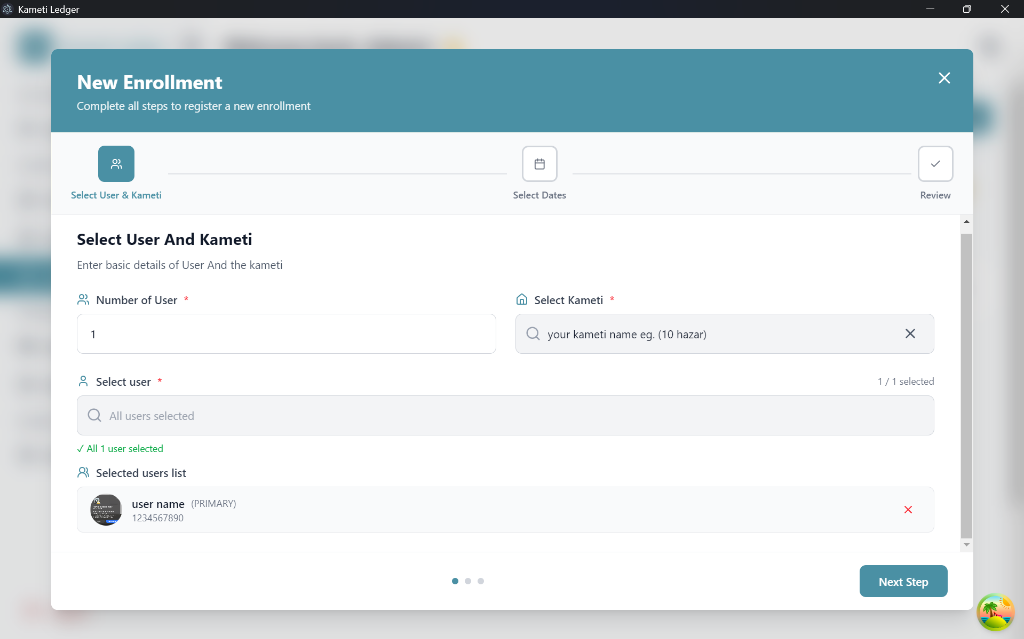
Step 1: Create New Enrollment
Go to the Enrollment tab and click on the “New Enrollment” button to open the enrollment wizard.
Step 2: Select User & Kameti
On this page, you need to configure the participants:
- Number of Users: Select how many users are enrolling for this specific share. This is useful when multiple members (e.g., 2 friends) want to split one Kameti share and its installments.
- Select Kameti: Choose the Kameti cycle for enrollment.
- Select Users: Search and select the member(s) you wish to enroll.
Step 3: Select Dates
Set the enrollment and payout timing:
- Start Date: The date when the user officially enrolls.
- Expected Withdrawal Date: Specify the month in which the user is scheduled to withdraw the Kameti amount.

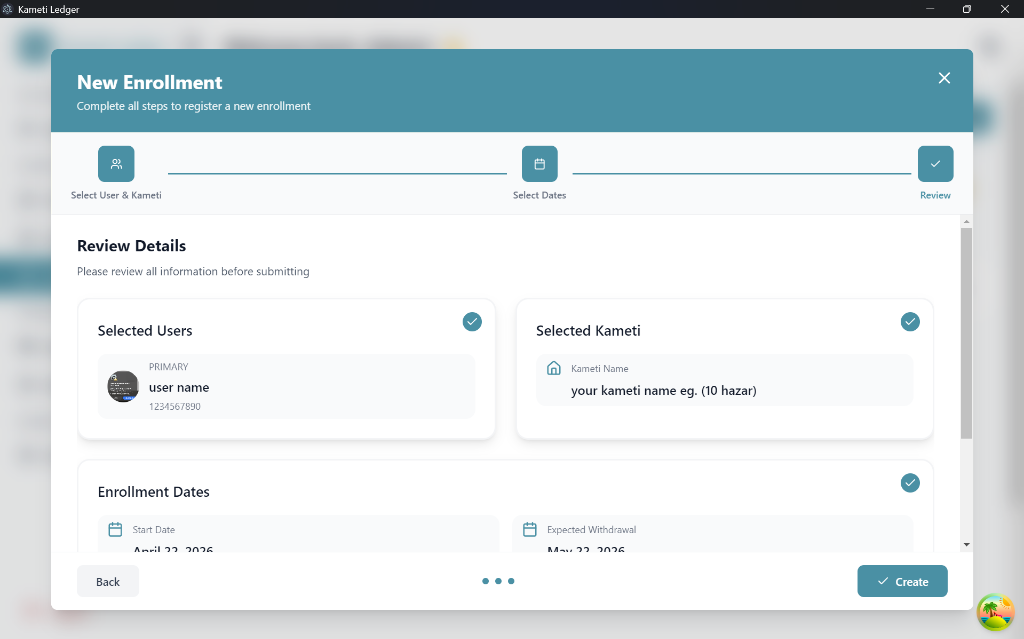
Step 4: Review Details
Verify all the entered information, including selected users, Kameti details, and dates. If everything is correct, click “Create”.
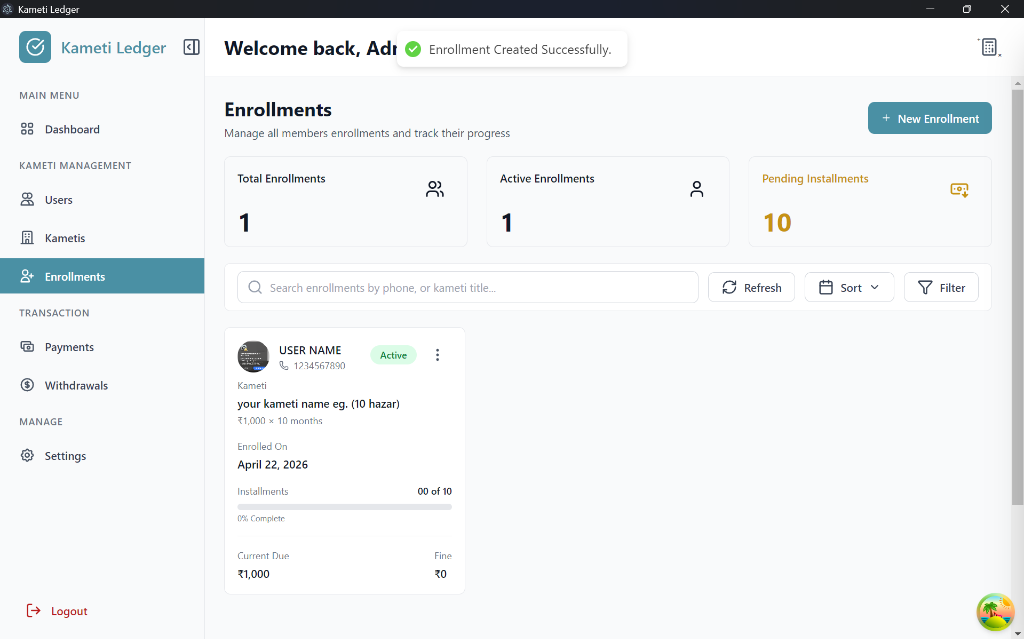
Step 5: Enrollment Created
After clicking create, you will be redirected to the Enrollment Dashboard. Here, you can see the newly created enrollment and track its progress.
3. Payment Collection
Once a user is enrolled in a Kameti, you can begin collecting their monthly installments. The system offers flexibility in how these payments are handled:
- Monthly Payments: Members can pay their installments month-by-month.
- Lump Sum: Members can pay multiple or all installments at once.
- Late Payments: Members can pay for previous months in the current month.
How to Record a Payment
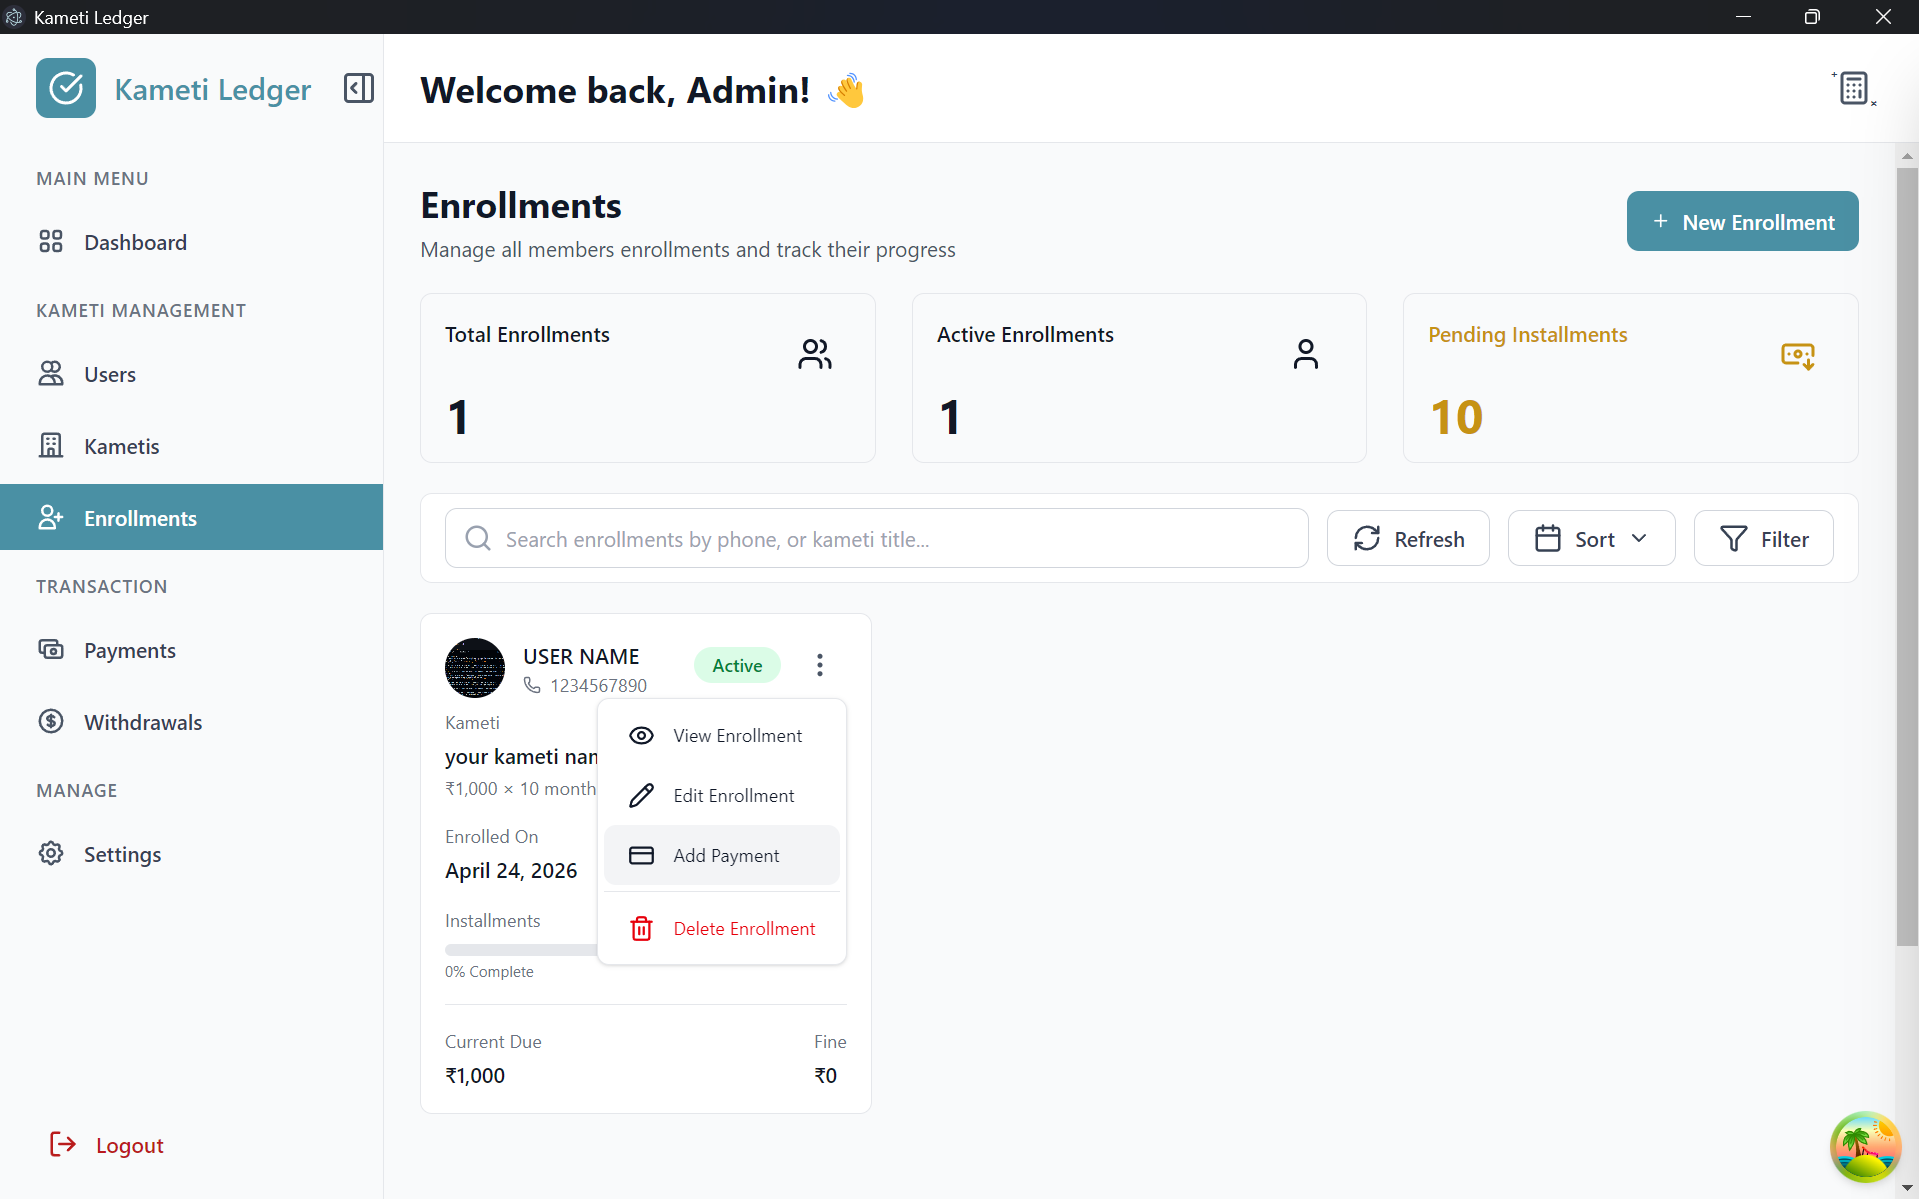
You can initiate a payment from the Users, Kametis, or Enrollment tabs. Here is how to do it from the Enrollment tab:
Step-by-Step Payment Process (From Enrollment Tab)
- Locate the specific enrollment.
- Click on the three dots (options menu).
- Select “Add Payment”.
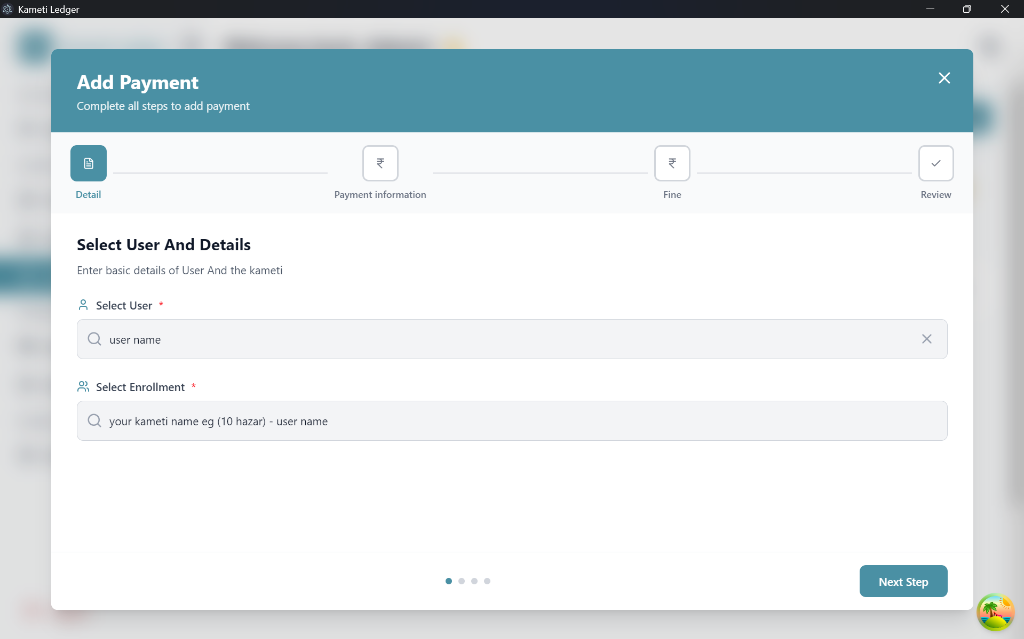
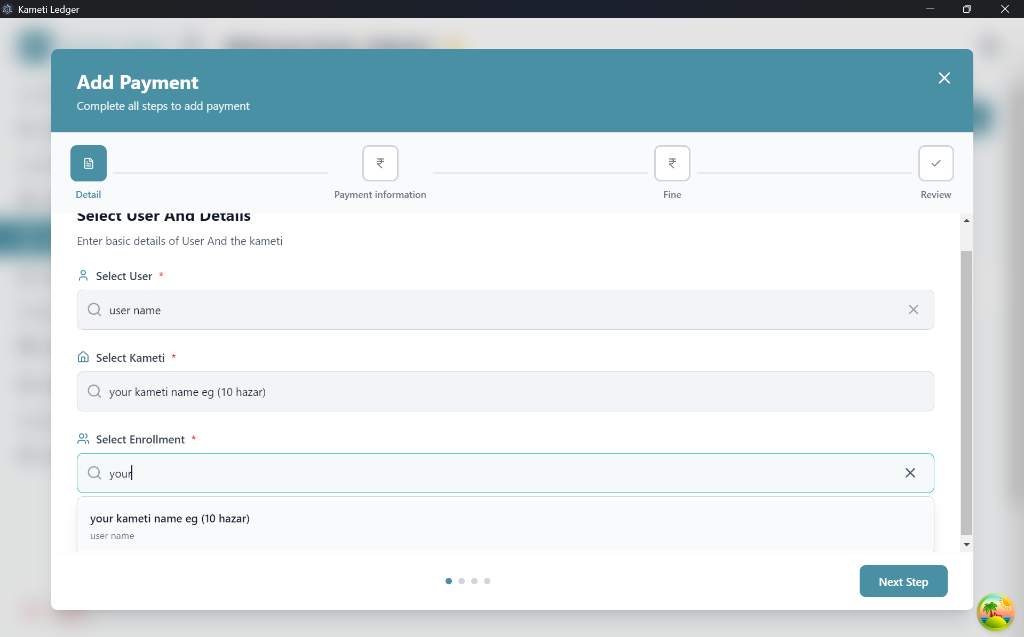
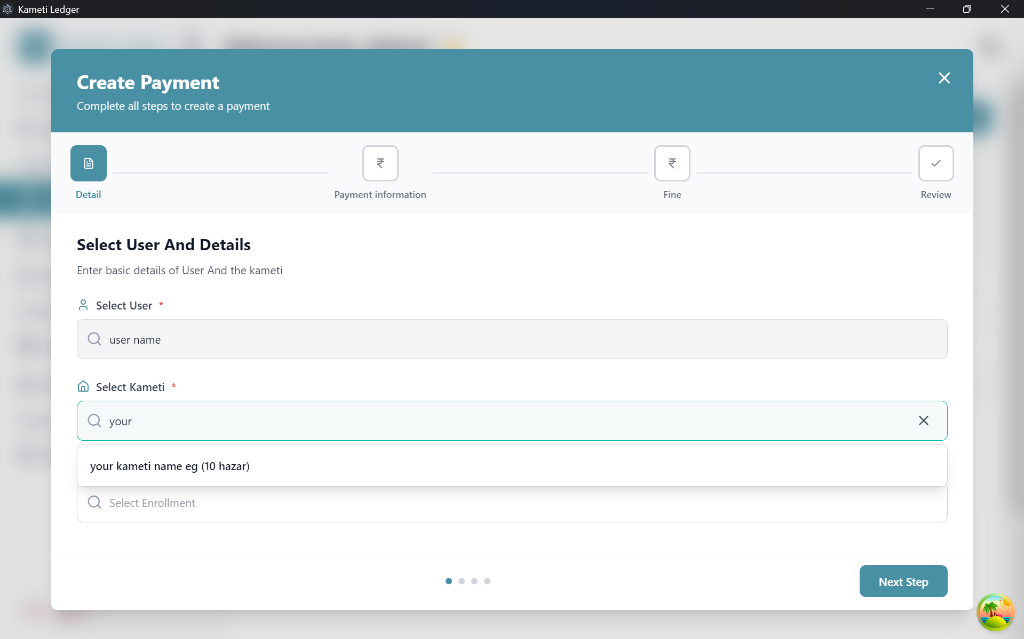
Step 1: Select User And Details
The user and enrollment are typically pre-selected when you initiate from the Enrollment tab. If there are multiple users for a single enrollment (shared share), you can search and select the specific user making the payment.
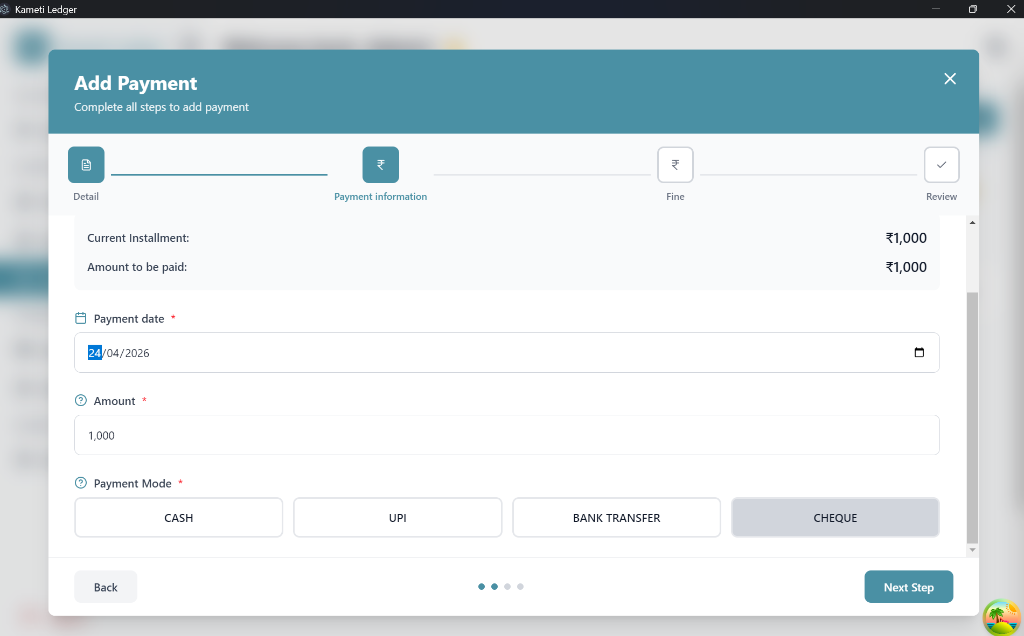
Step 2: Payment Information
In this step, enter the transaction details:
-
Payment Date: Select the date the payment was received.
-
Amount: Enter the amount received.
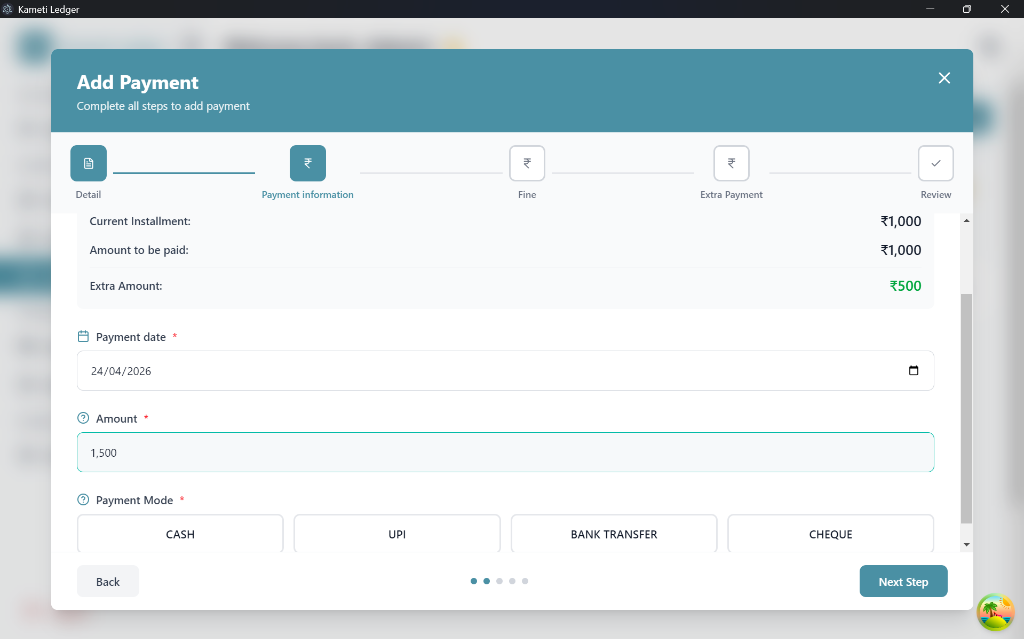
- The system shows the Current Installment (the base amount) and the Amount to be paid (considering any previous balances).
- If a user pays more than the required amount, an Extra Amount will be displayed in green.
-
Payment Mode: Select the mode (Cash, UPI, Bank Transfer, or Cheque).
-
Description: For non-cash payments, you can add details like a transaction ID for tracking.
-
Normal Payment: Use this for standard installment amounts.
-
Extra Payment: The system automatically detects and highlights extra payments in green.
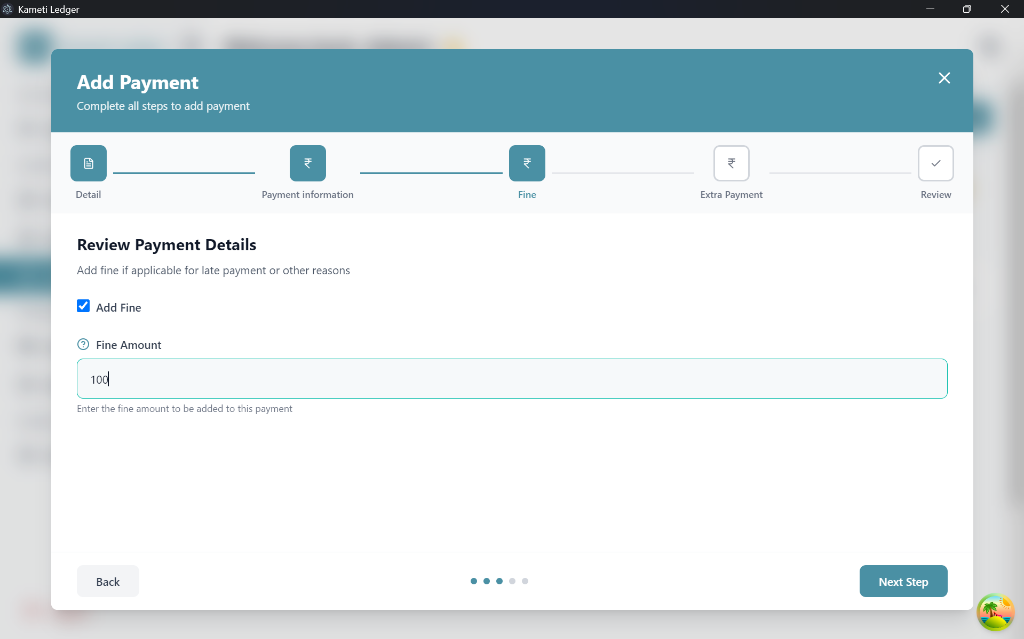
Step 3: Add Fine (Optional)
If a user is paying late or needs to be penalized for any reason, you can add a fine amount on this page.
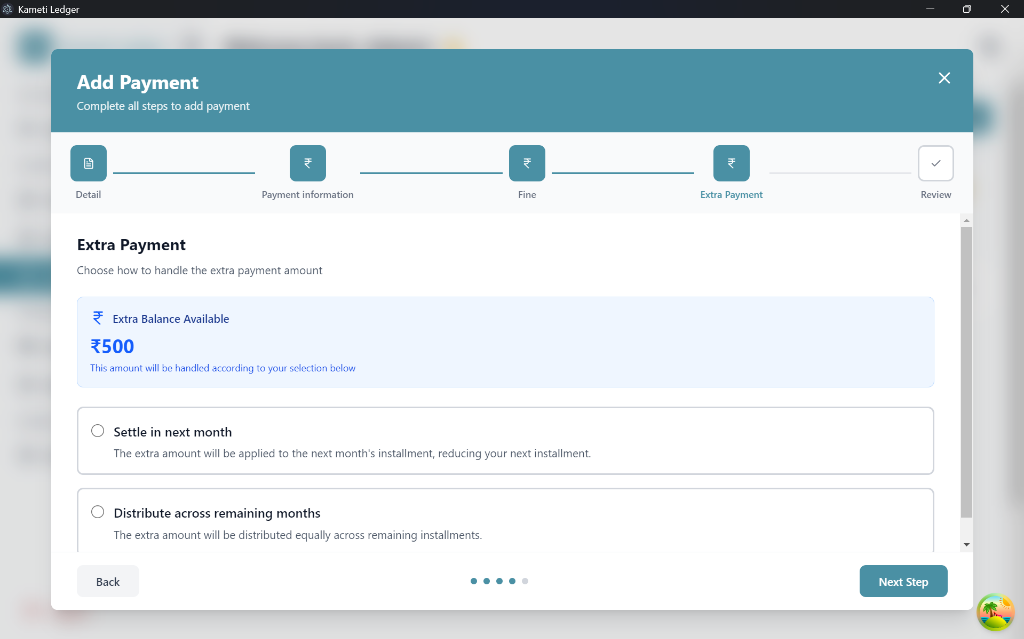
Step 4: Extra Payment Adjustment
If the user paid an extra amount in Step 2, you must decide how to handle the surplus:
- Settle in next month: The extra amount will be deducted from the next month’s installment.
- Distribute across remaining months: The surplus will be distributed equally across all future installments.
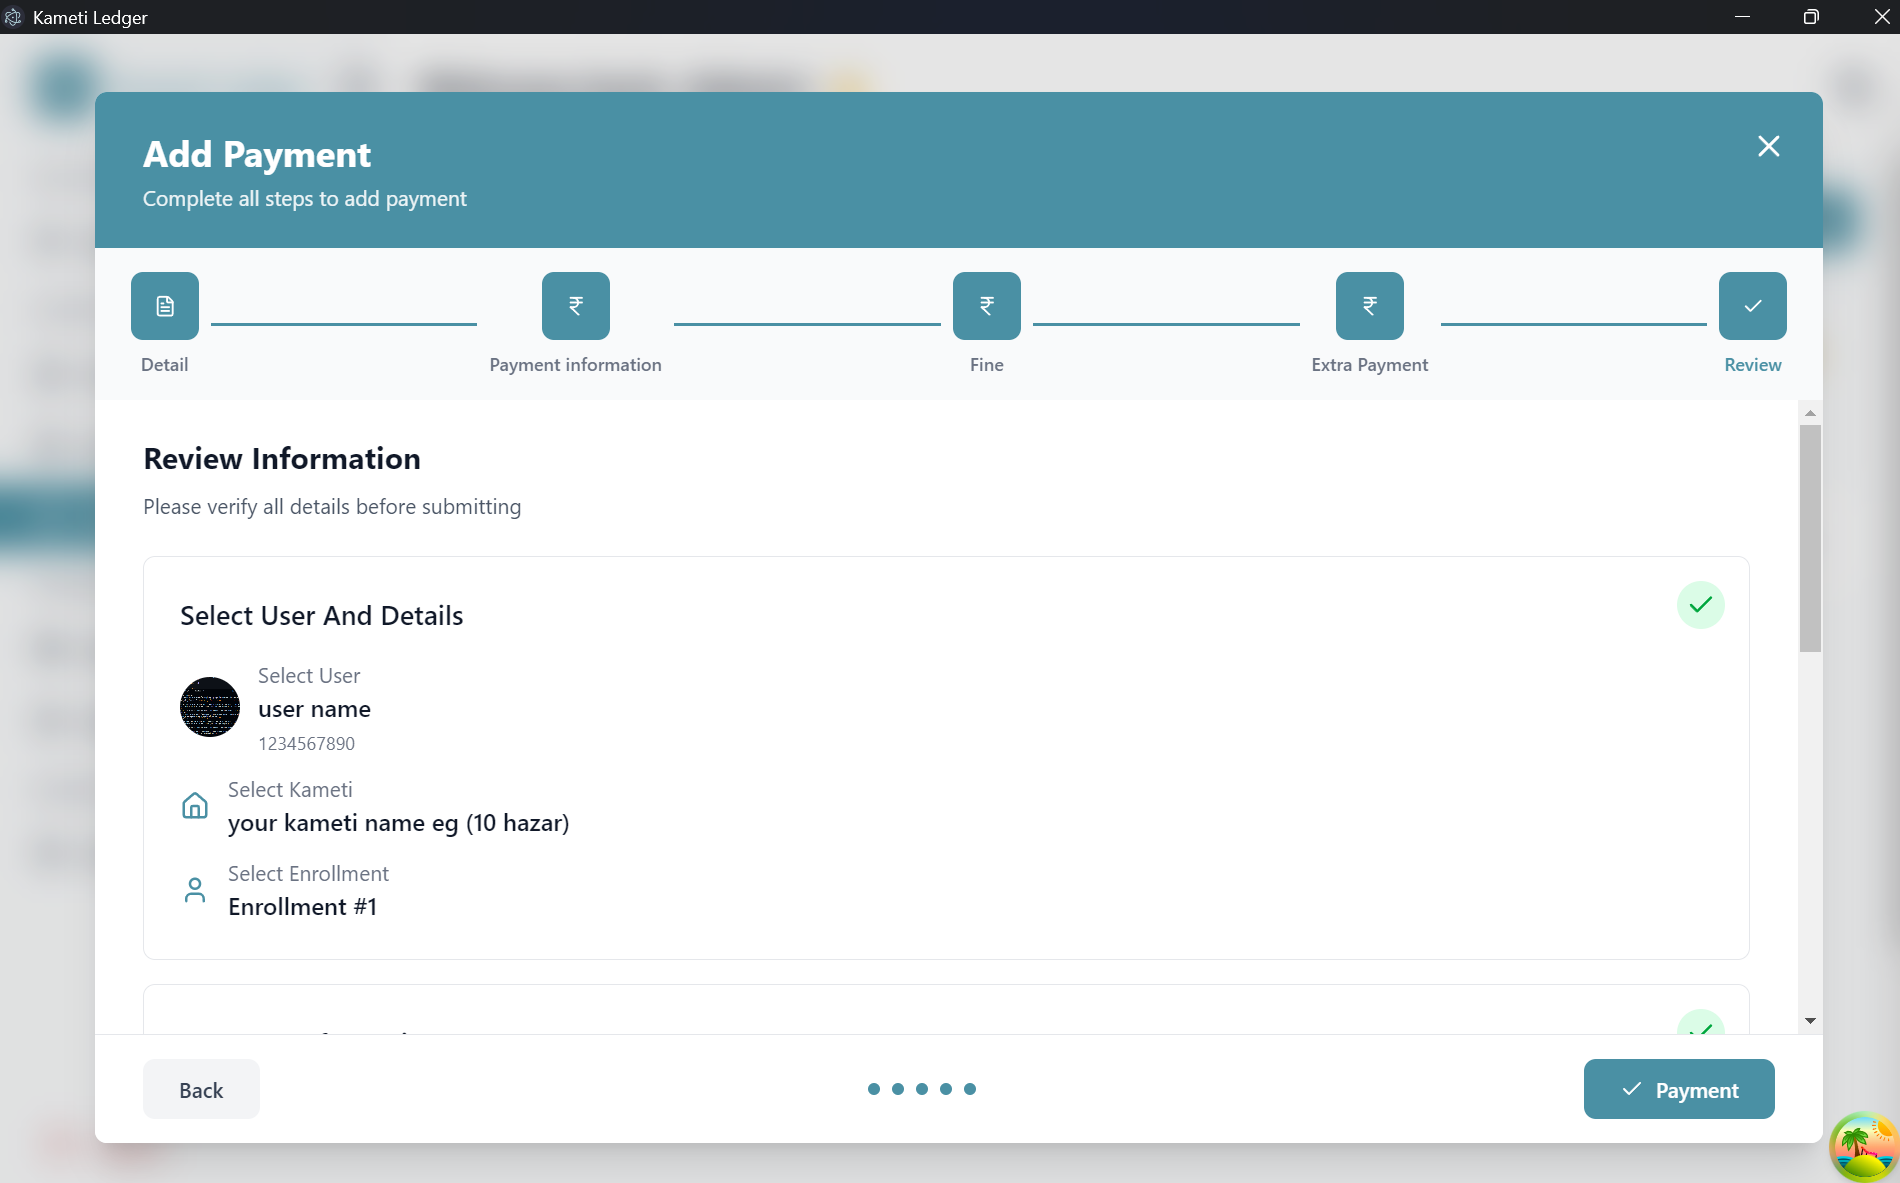
Step 5: Review & Make Payment
Finally, review the payment summary on the overview page. Once confirmed, click “Payment” to finalize the transaction.
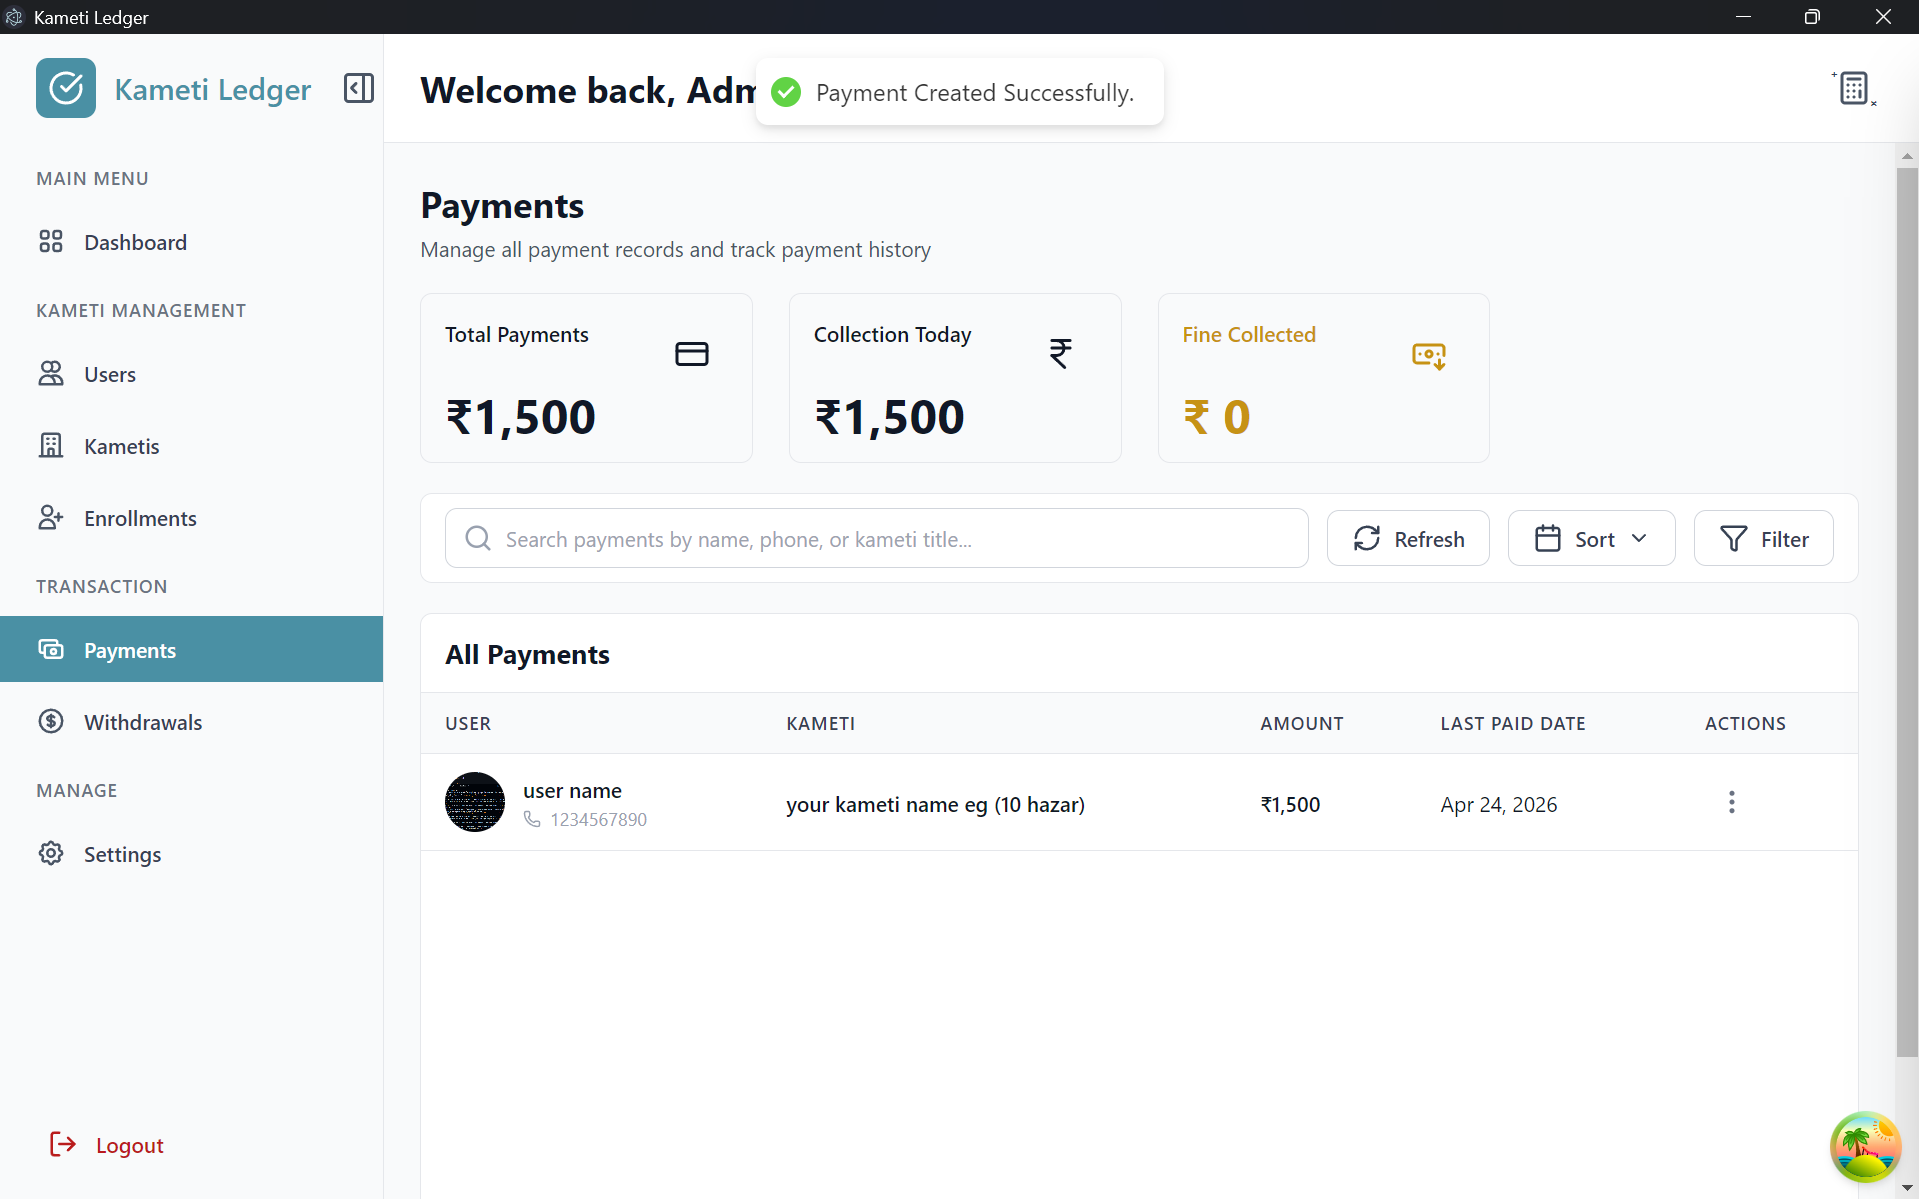
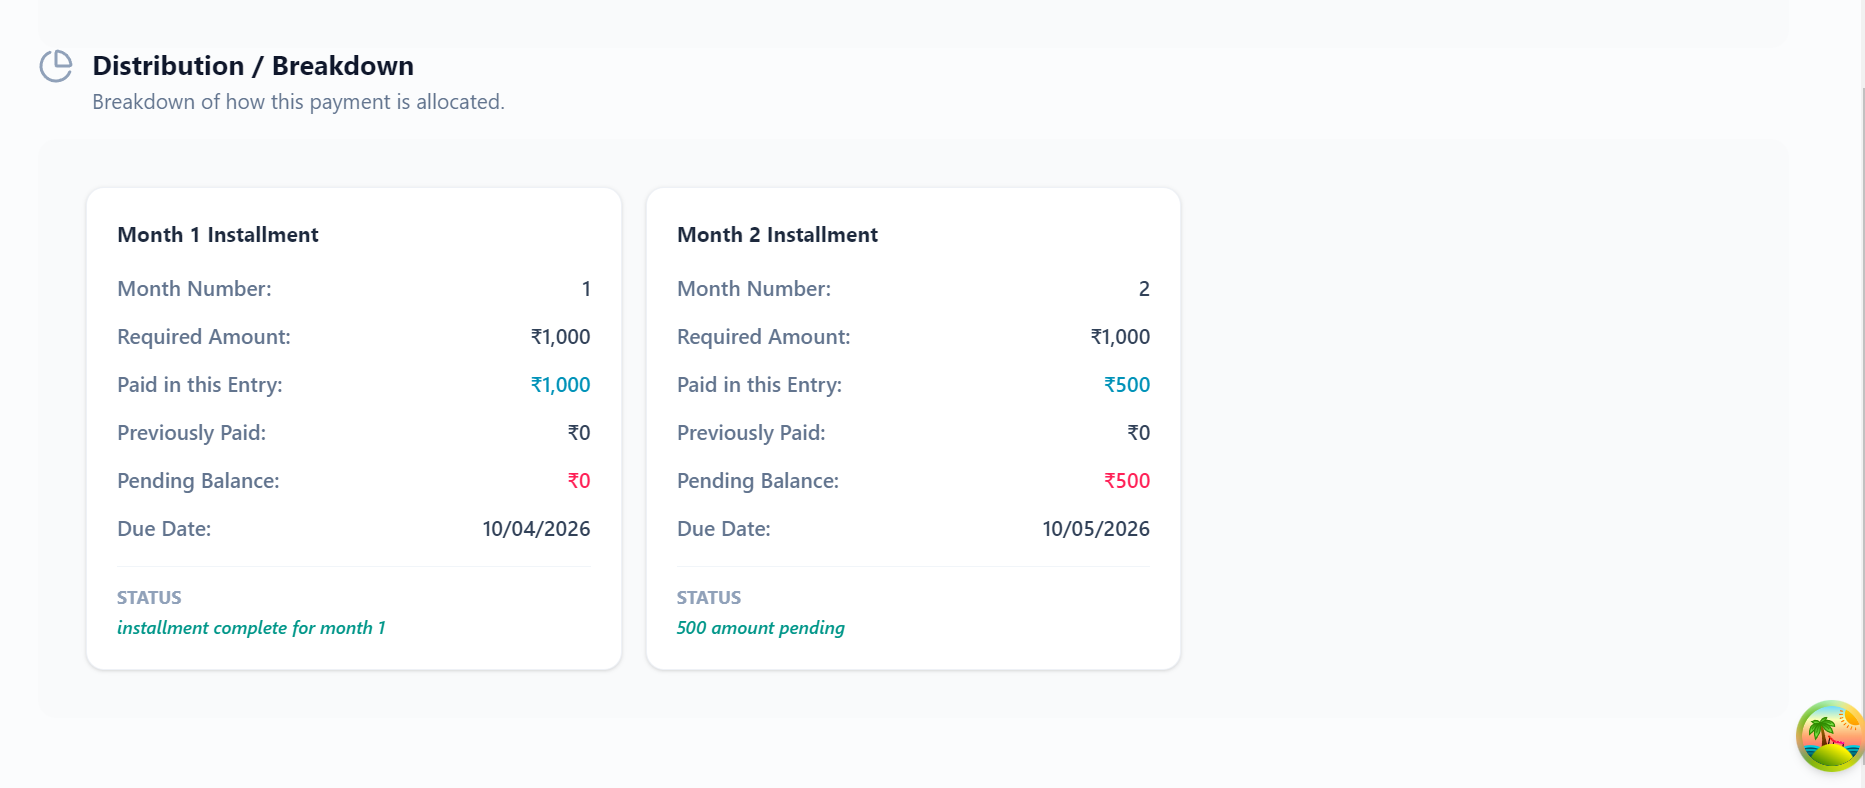
Tracking Payments
After a payment is made, you can track it in the Payments tab.
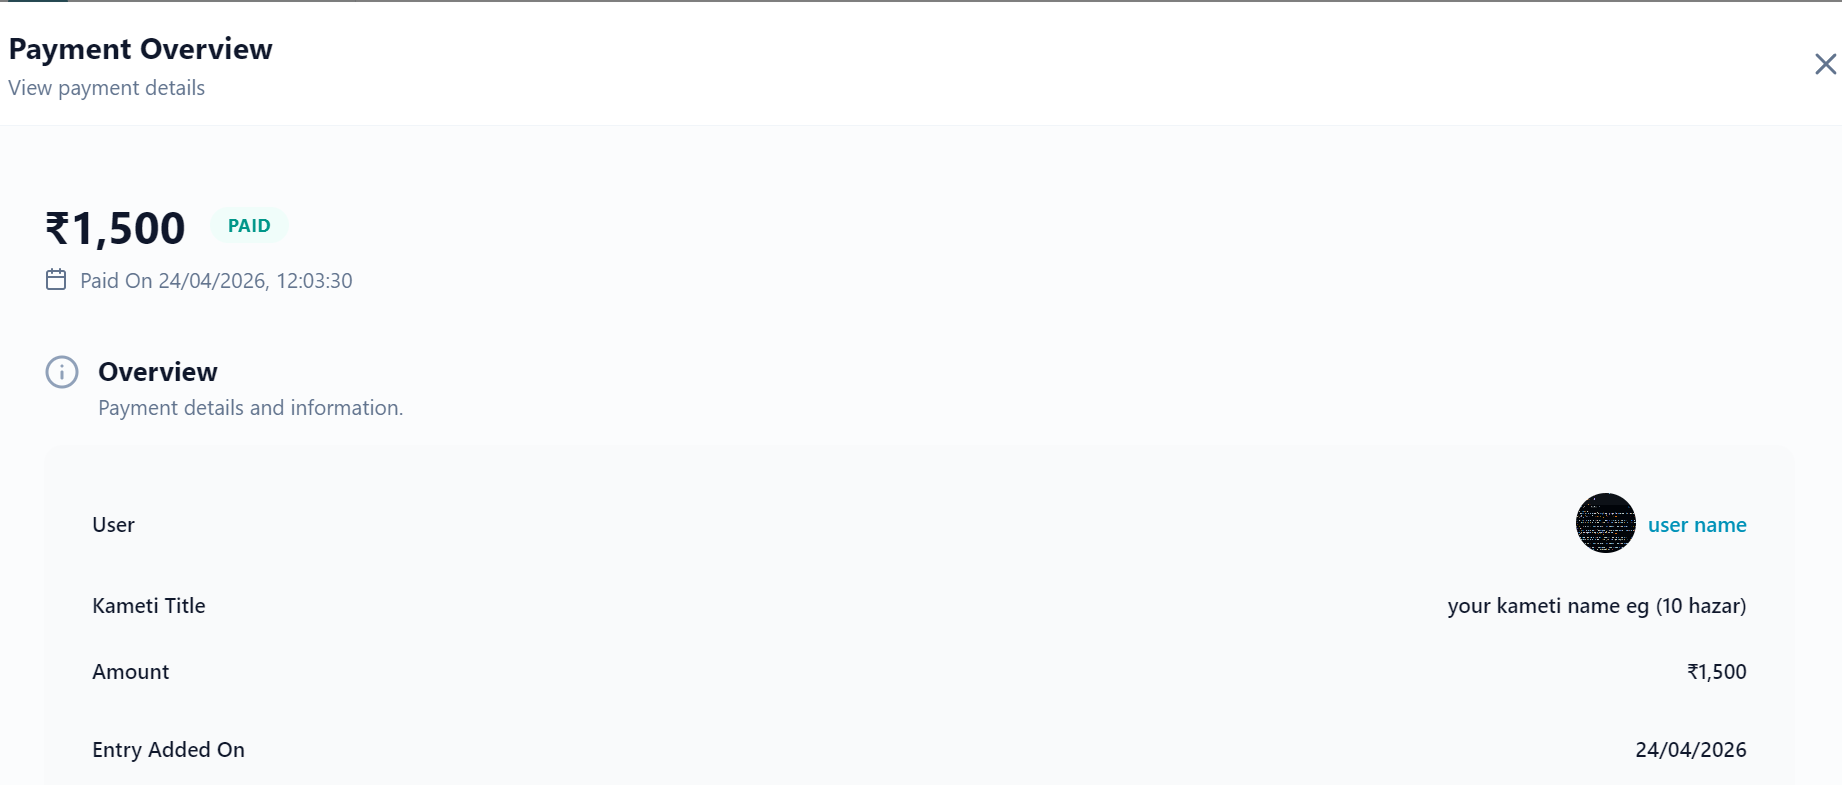
For Setted in next month
- View the total amount paid and how it was adjusted across installments.
- Click the three dots on a payment record and select “View” to see a detailed breakdown. For example, if a user paid ₹1,500 for a ₹1,000 installment, you will see ₹1,000 applied to the current month and ₹500 adjusted to the next.
For Distribute across remaining months
- View the total amount paid and how it was adjusted across installments.
- Click the three dots on a payment record and select “View” to see a detailed breakdown. For example, if a user paid ₹1,000 for a ₹500 extra was there, you will see ₹500 applied to the current month and ₹500 distributed across remaining months.

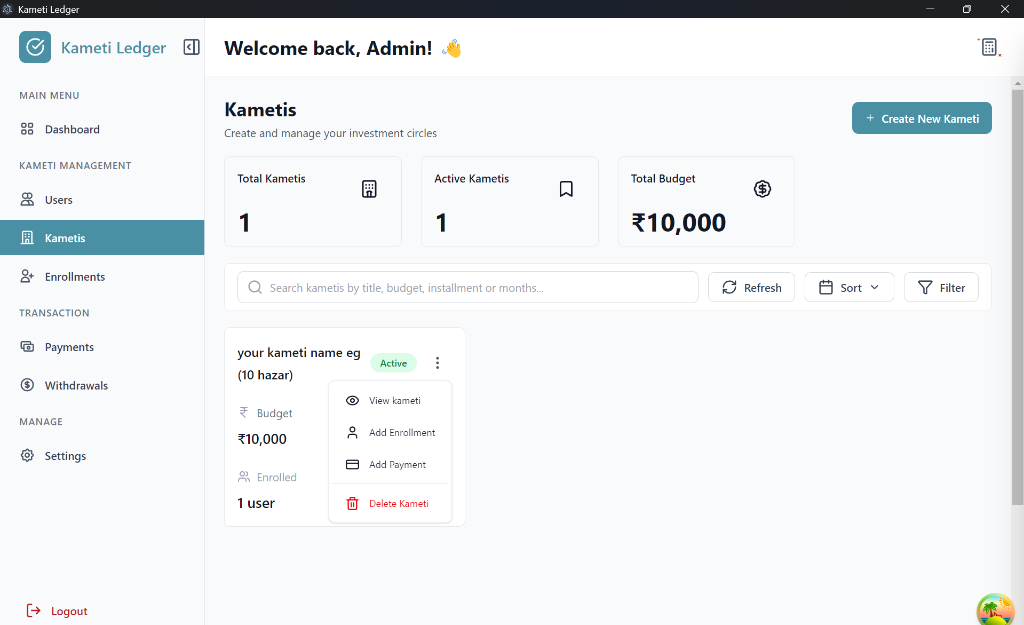
Payment Process (From Kameti Tab)
You can also record payments directly from the Kametis tab. This is useful when you are managing a specific Kameti cycle and want to add payments for its members:
- Go to the Kametis tab.
- Locate the Kameti and click the three dots (options menu).
- Select “Add Payment”.
- On the next page, search and select the User Name.
- Select the specific Enrollment for that user.
Once these details are selected, click “Next Step” to proceed to Step 2: Payment Information, which follows the same process as described in the Enrollment tab section.
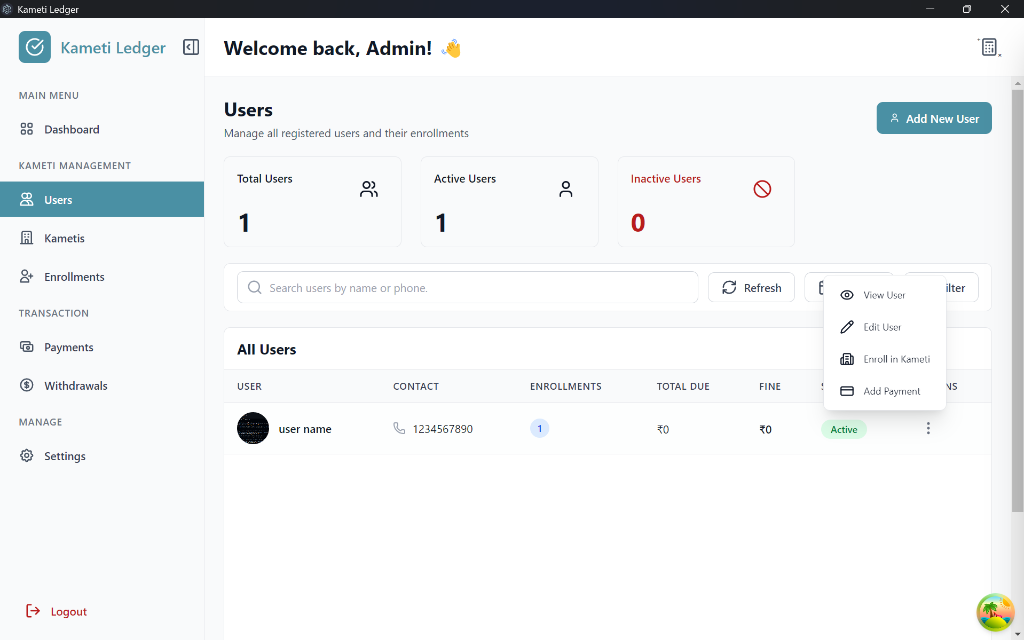
Step-by-Step Payment Process (From User Tab)
Initiating a payment from the Users tab is efficient when you are looking up a specific member’s profile:
- Go to the Users tab.
- Find the user and click the three dots (options menu) on their row.
- Select “Add Payment”.
- On the next page, the User is automatically selected.
- Search and select the Kameti and then the specific Enrollment for that user.
Once these details are selected, click “Next Step” to proceed to Step 2: Payment Information.
4. Withdrawal Management
The final stage of the monthly cycle is the payout. In Kameti Ledger, every enrollment automatically generates a default “Pending” withdrawal entry. This section explains how to manage and approve these payouts.
Managing Withdrawals
You can track all payout records in the Withdrawals tab. Here, you will see a list of all members and their scheduled withdrawal months.
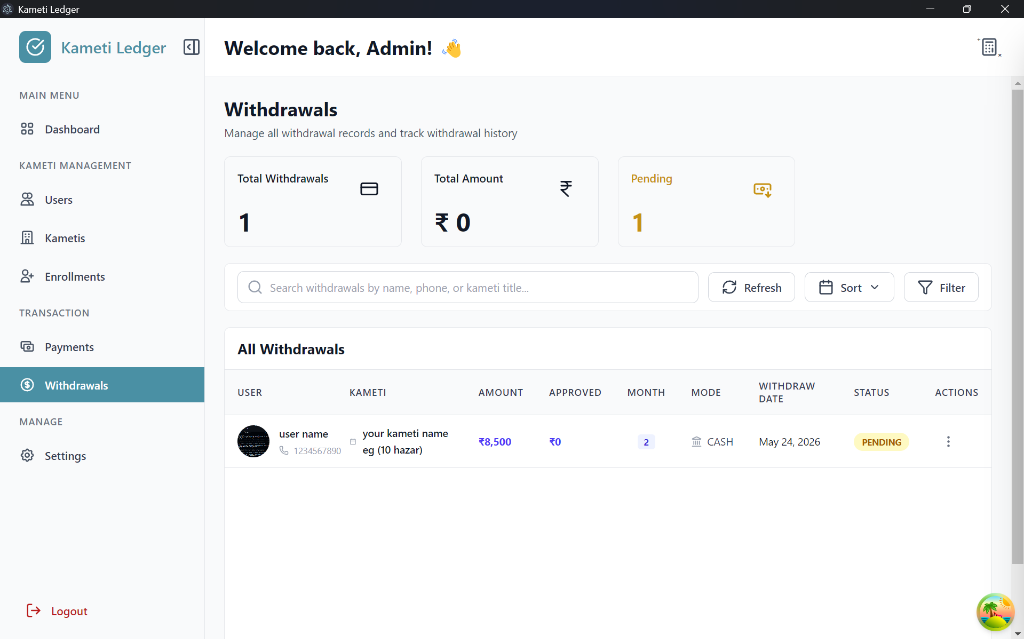
To process a withdrawal:
- Locate the pending entry for the member.
- Click the three dots (options menu) and select “View” to see the basic payout details.
- Click the “Edit” button within the view page to open the Edit Withdrawal wizard.
Step-by-Step Approval Process
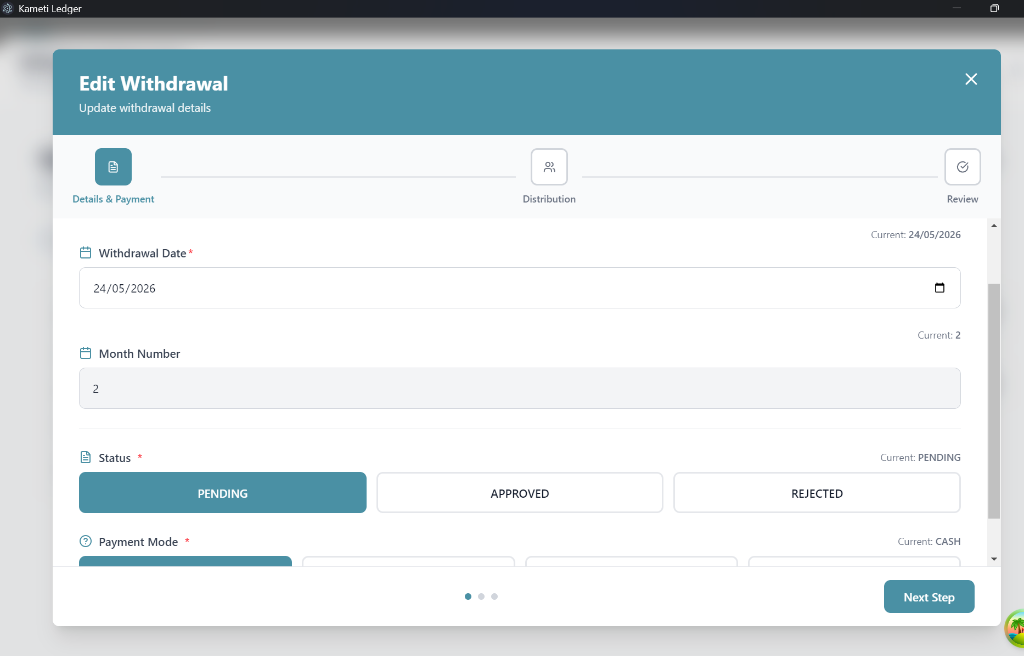
Step 1: Details & Payment
In this step, you configure the timing and status of the payout:
- Withdrawal Date: Select the actual date the funds are being released.
- Month Number: Update the installment month for which this withdrawal is being processed.
- Status: Change the status from Pending to Approved (to release funds) or Rejected.
- Payment Mode: Select the method used to pay the user (e.g., Cash, Bank Transfer).
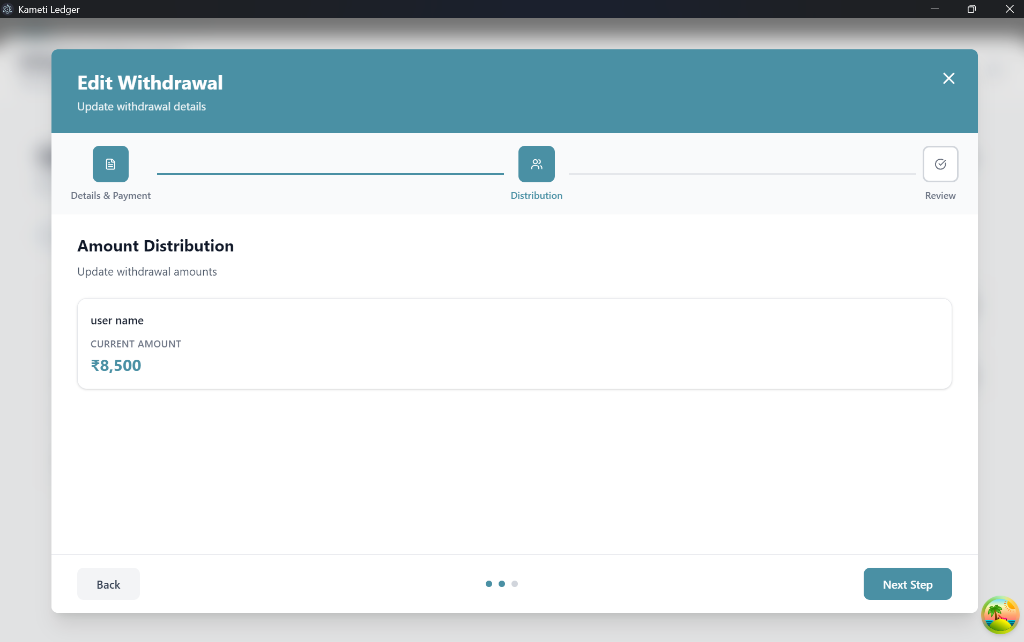
Step 2: Distribution
This page displays the total amount the user is withdrawing for the selected cycle. Review the amount to ensure it matches the Kameti’s payout schedule.
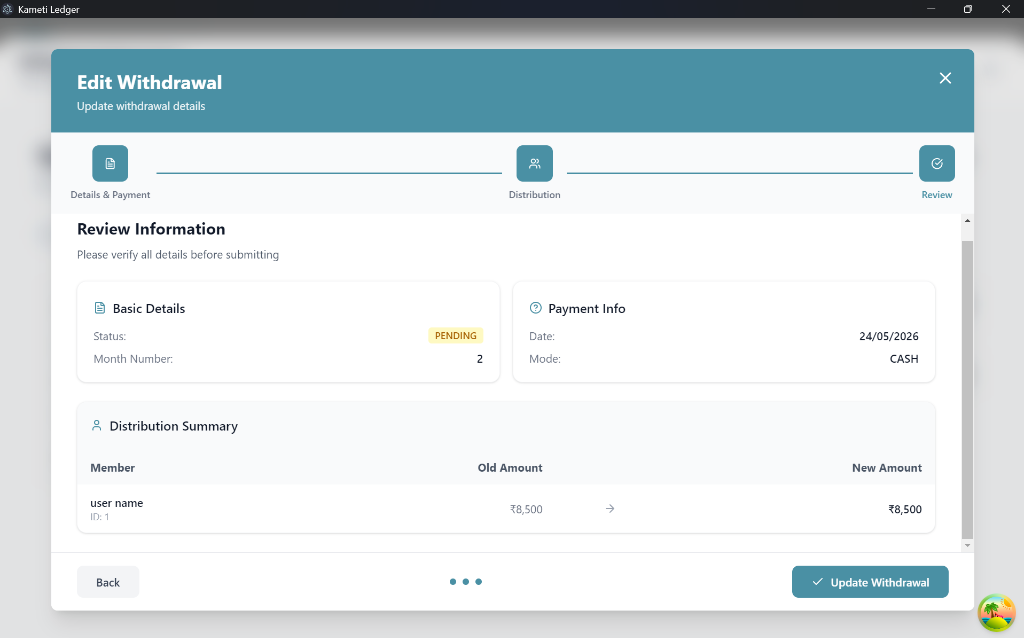
Step 3: Review Information
Verify all the updated details, including the new status, date, and payment mode. If everything is correct, click “Update Withdrawal”.
Finalizing the Payout
After updating, the withdrawal status will change in the dashboard.
Important: Once a withdrawal status is set to Approved or Rejected, the entry becomes locked. You will not be able to update the details for that payout again.
Next Steps
After mastering Kameti Operations, you can explore: